Welcome to our Totally Techniques Blog Hop for November!
I’m Angela McFarlane from Gold Coast, Australia.
Each month our team chooses a different technique to feature and this month we will be showcasing the Water Colour Pencil Techniques.
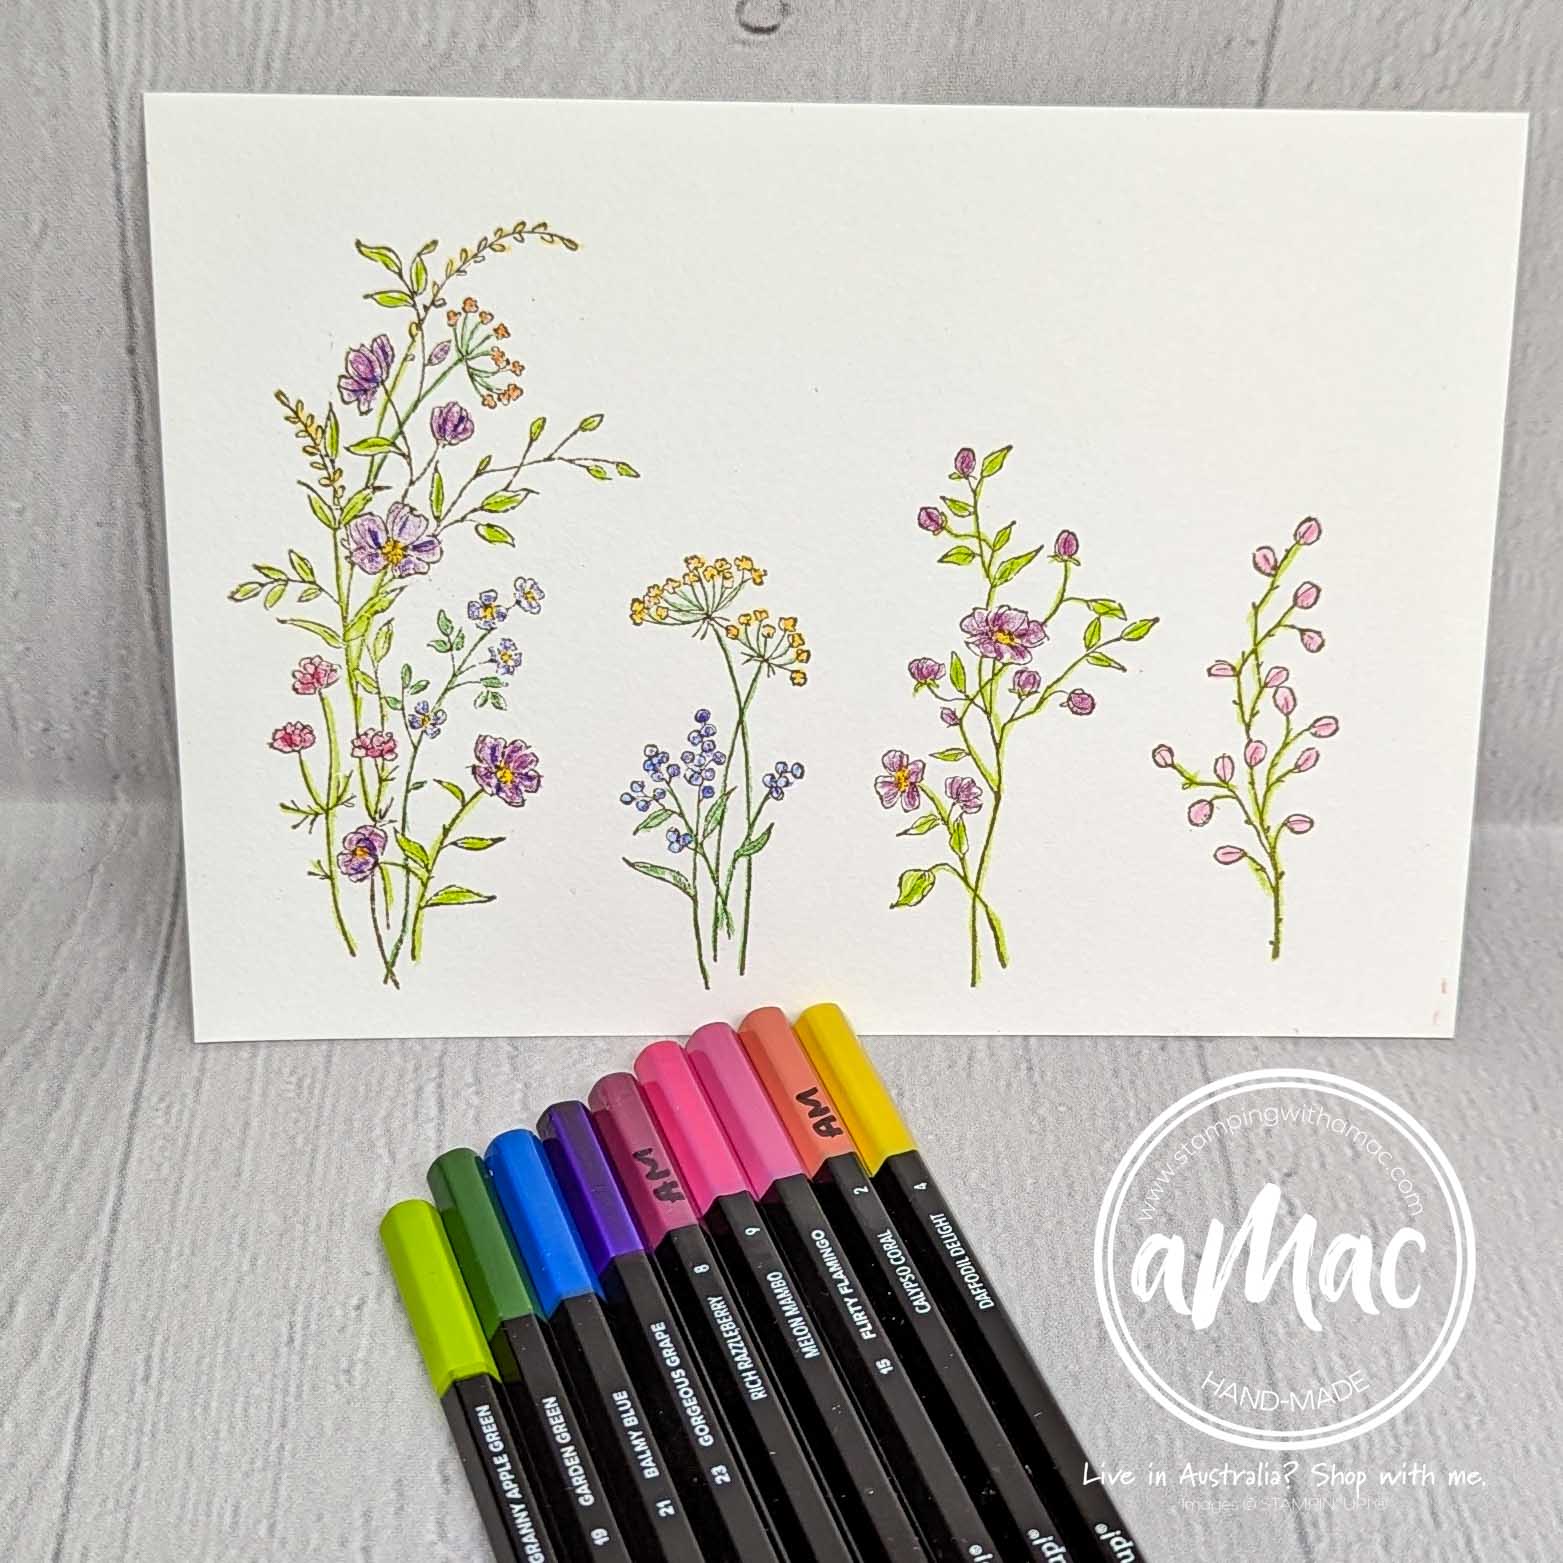
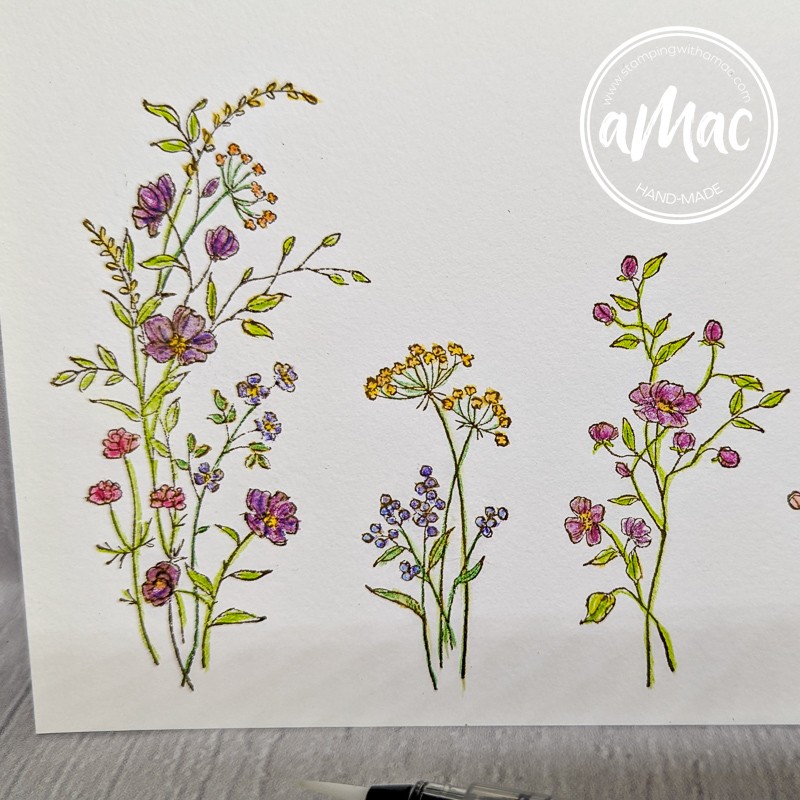
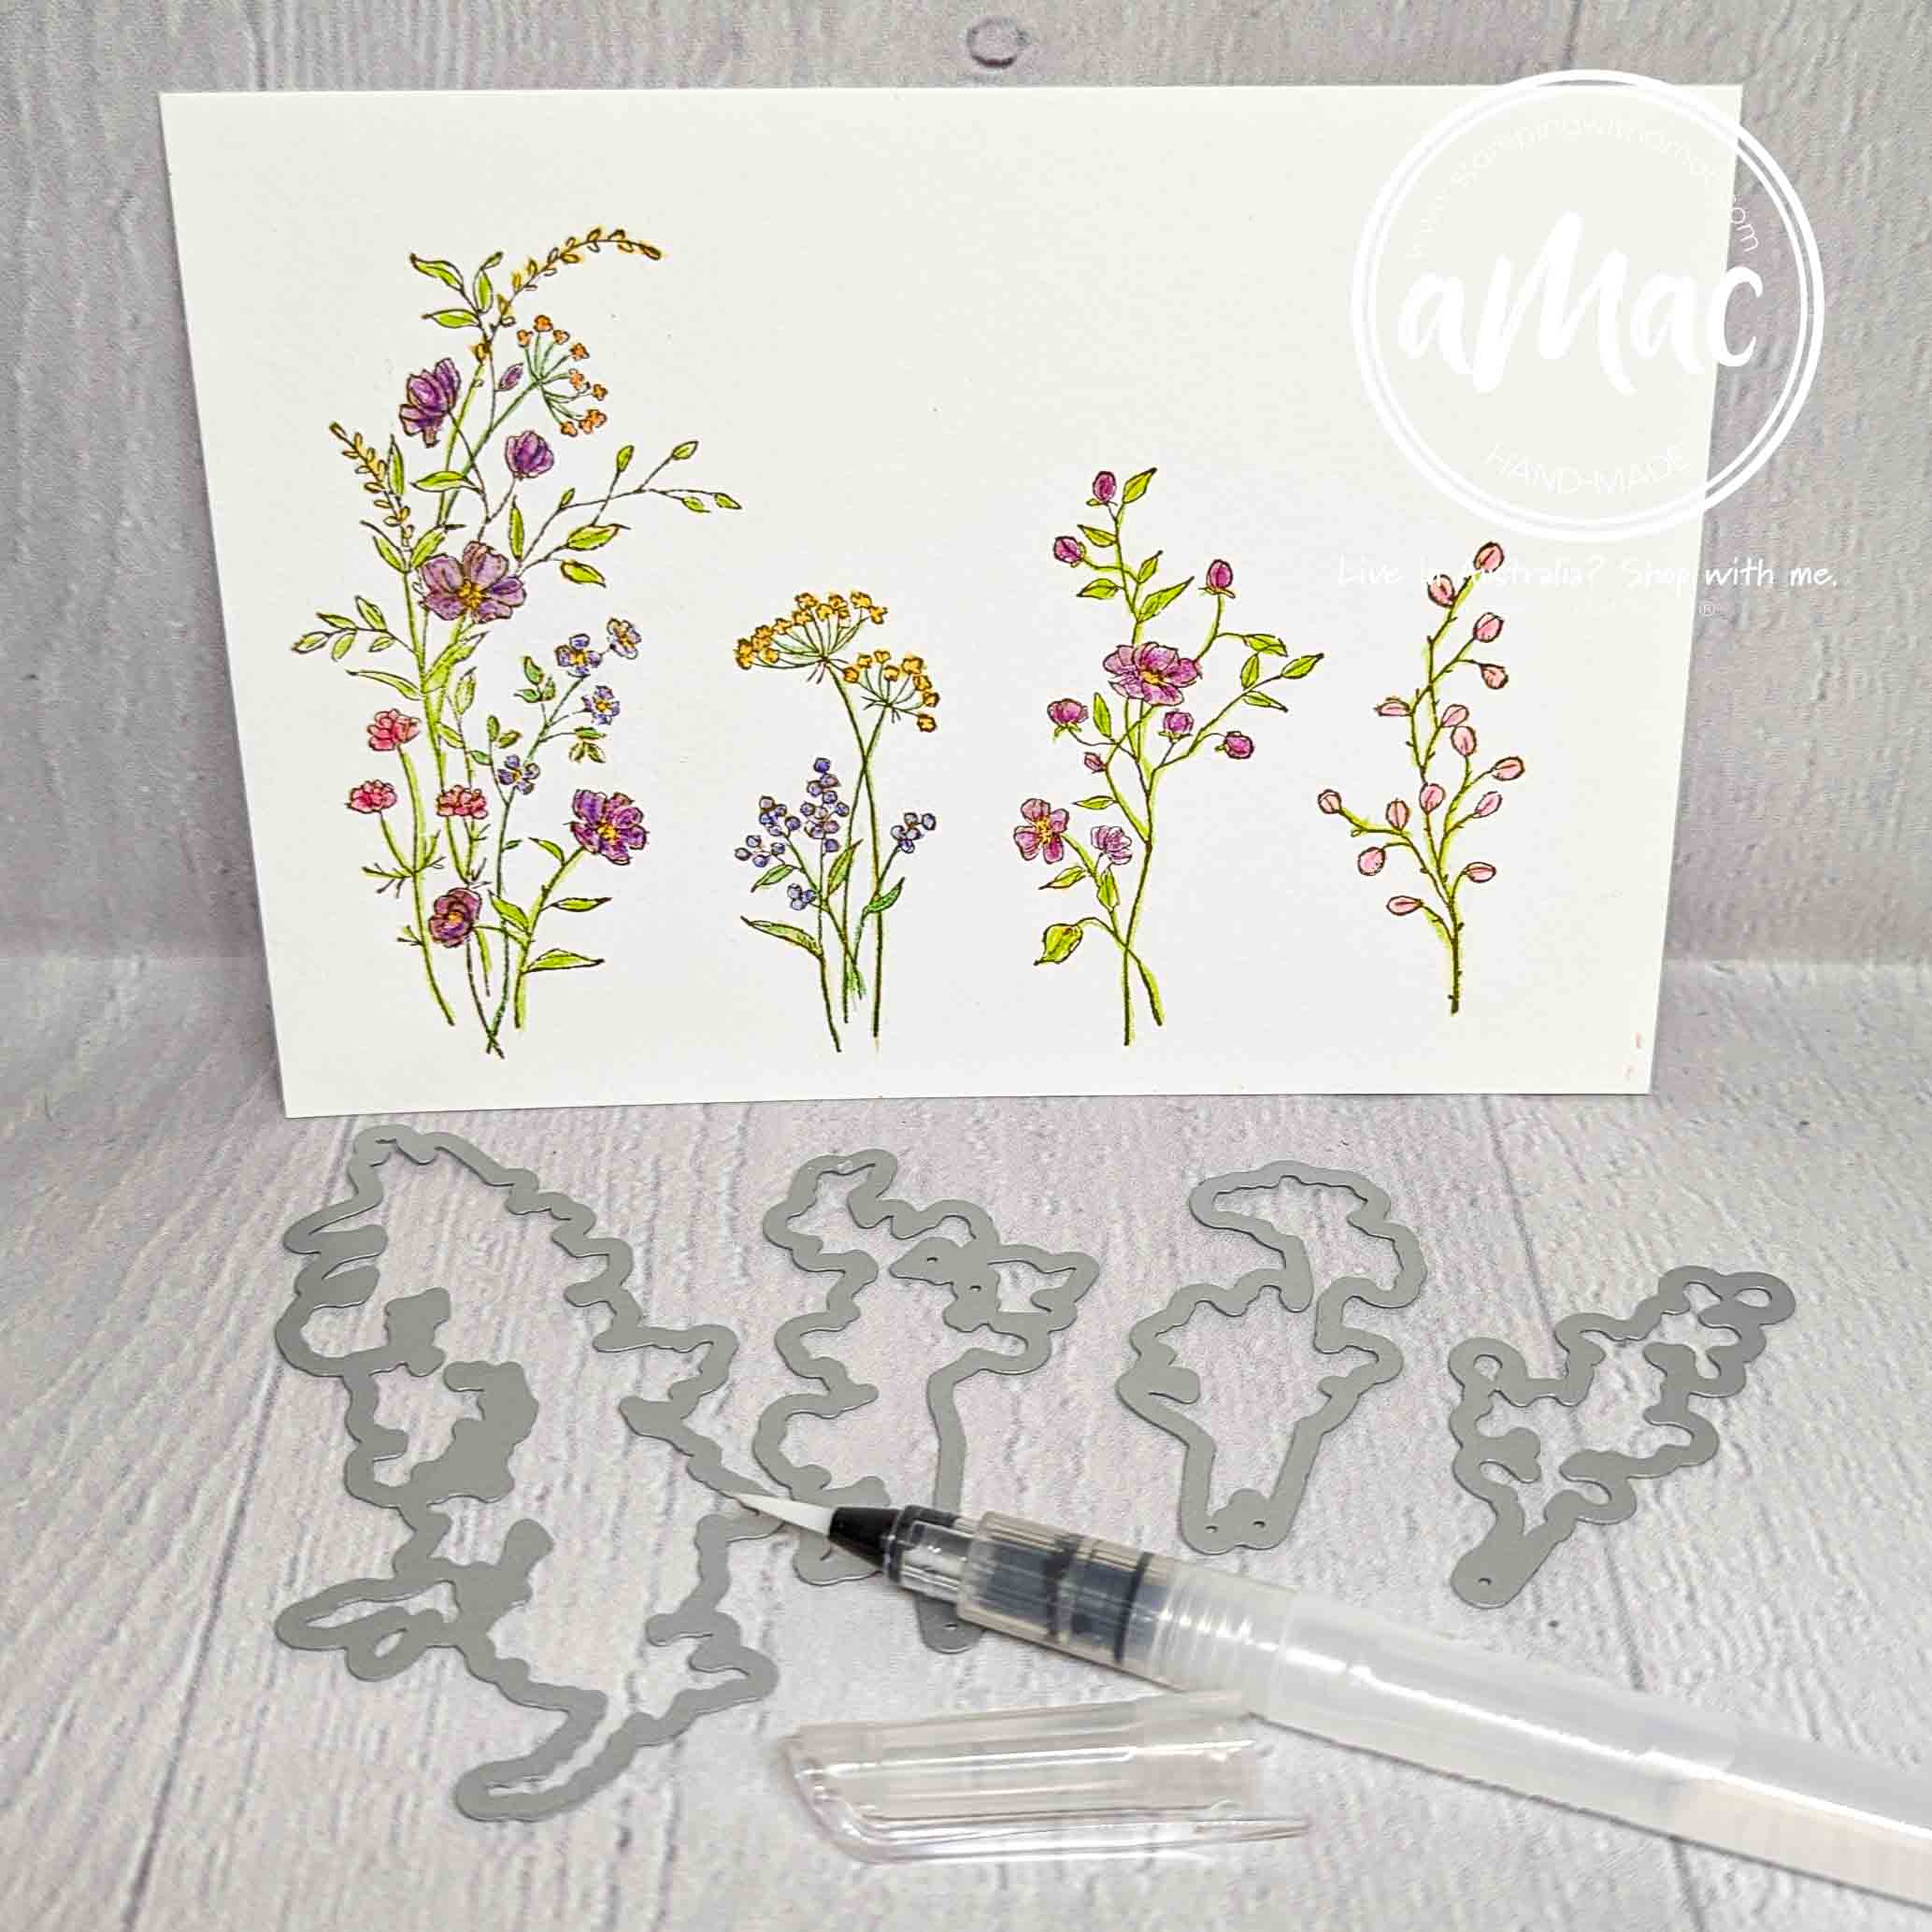
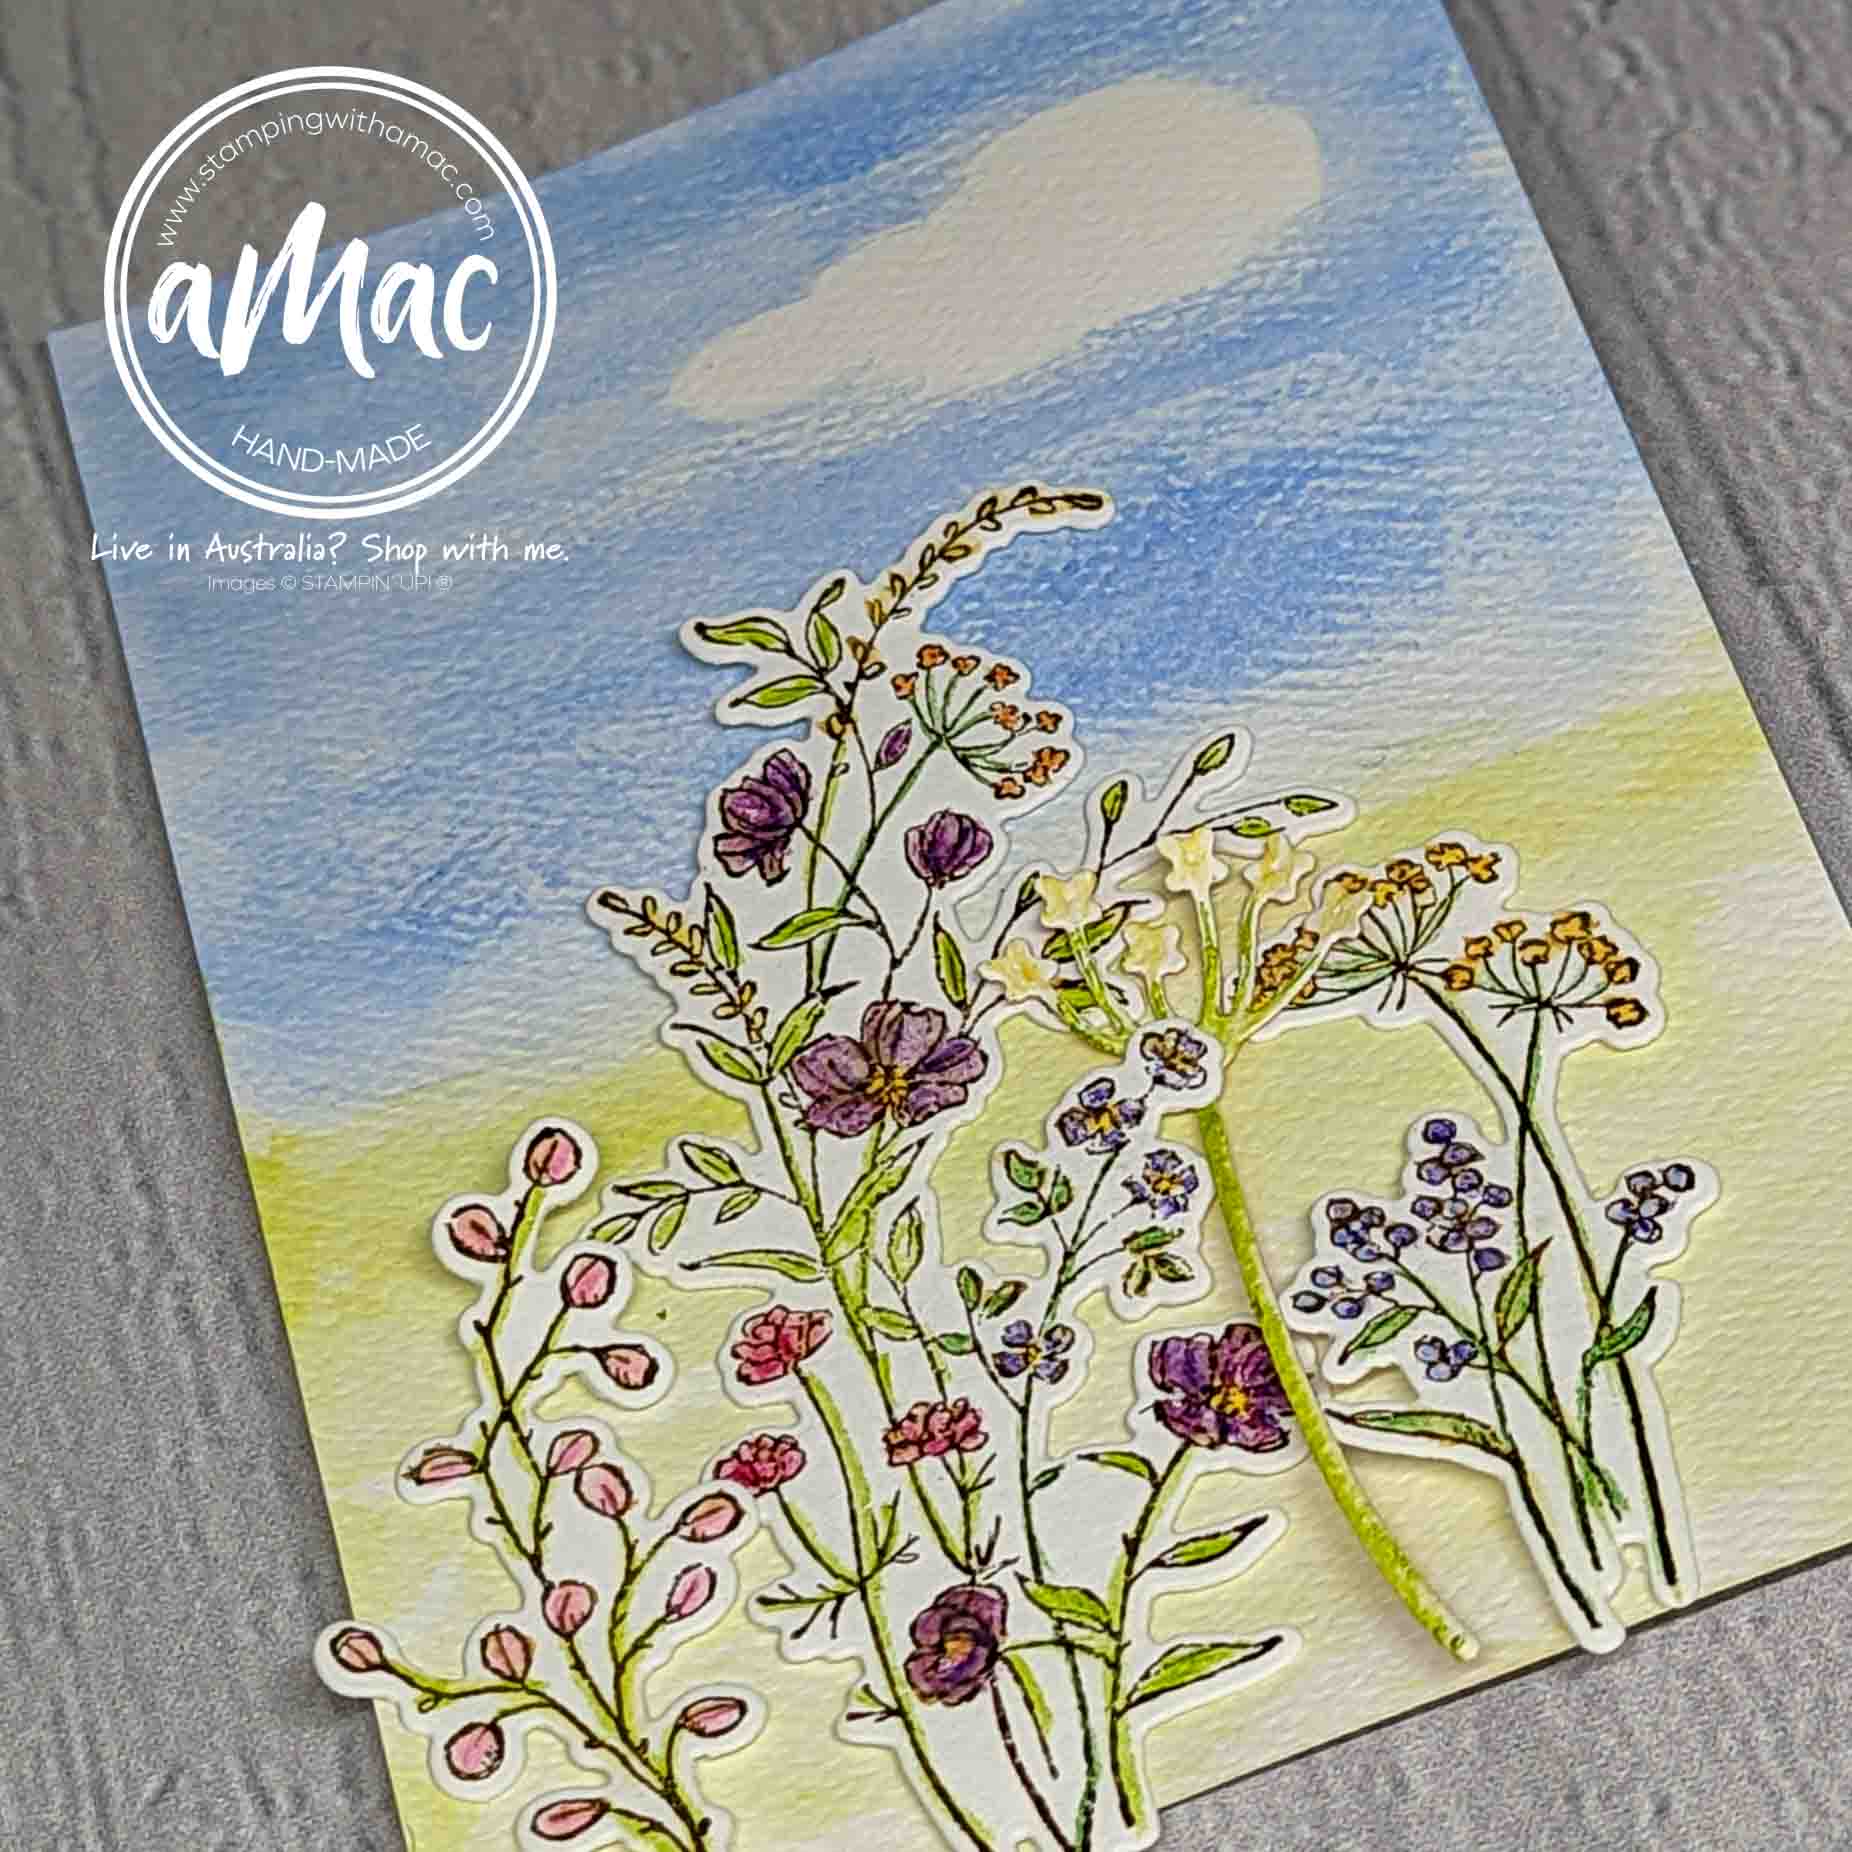
There’s a lot of different ways to use our Stampin’Up! Water Colour Pencils and I’ve chosen to use them on traditional water colour paper. You can vary the shade depending on how much pencil you apply, hence they are fantastic for shading as well as adding lots of different colours to your stamped or die cut images.
Here’s a few tips to keep in mind:
Don’t over sharpen your pencils
You can mix colours together, there’s no rules! Get creative and have a play
The top of the water painters unscrew in the opposite of normal direction.
At the end of my blog please ‘hop along’ to see all the different ideas our talented team have to share with you.
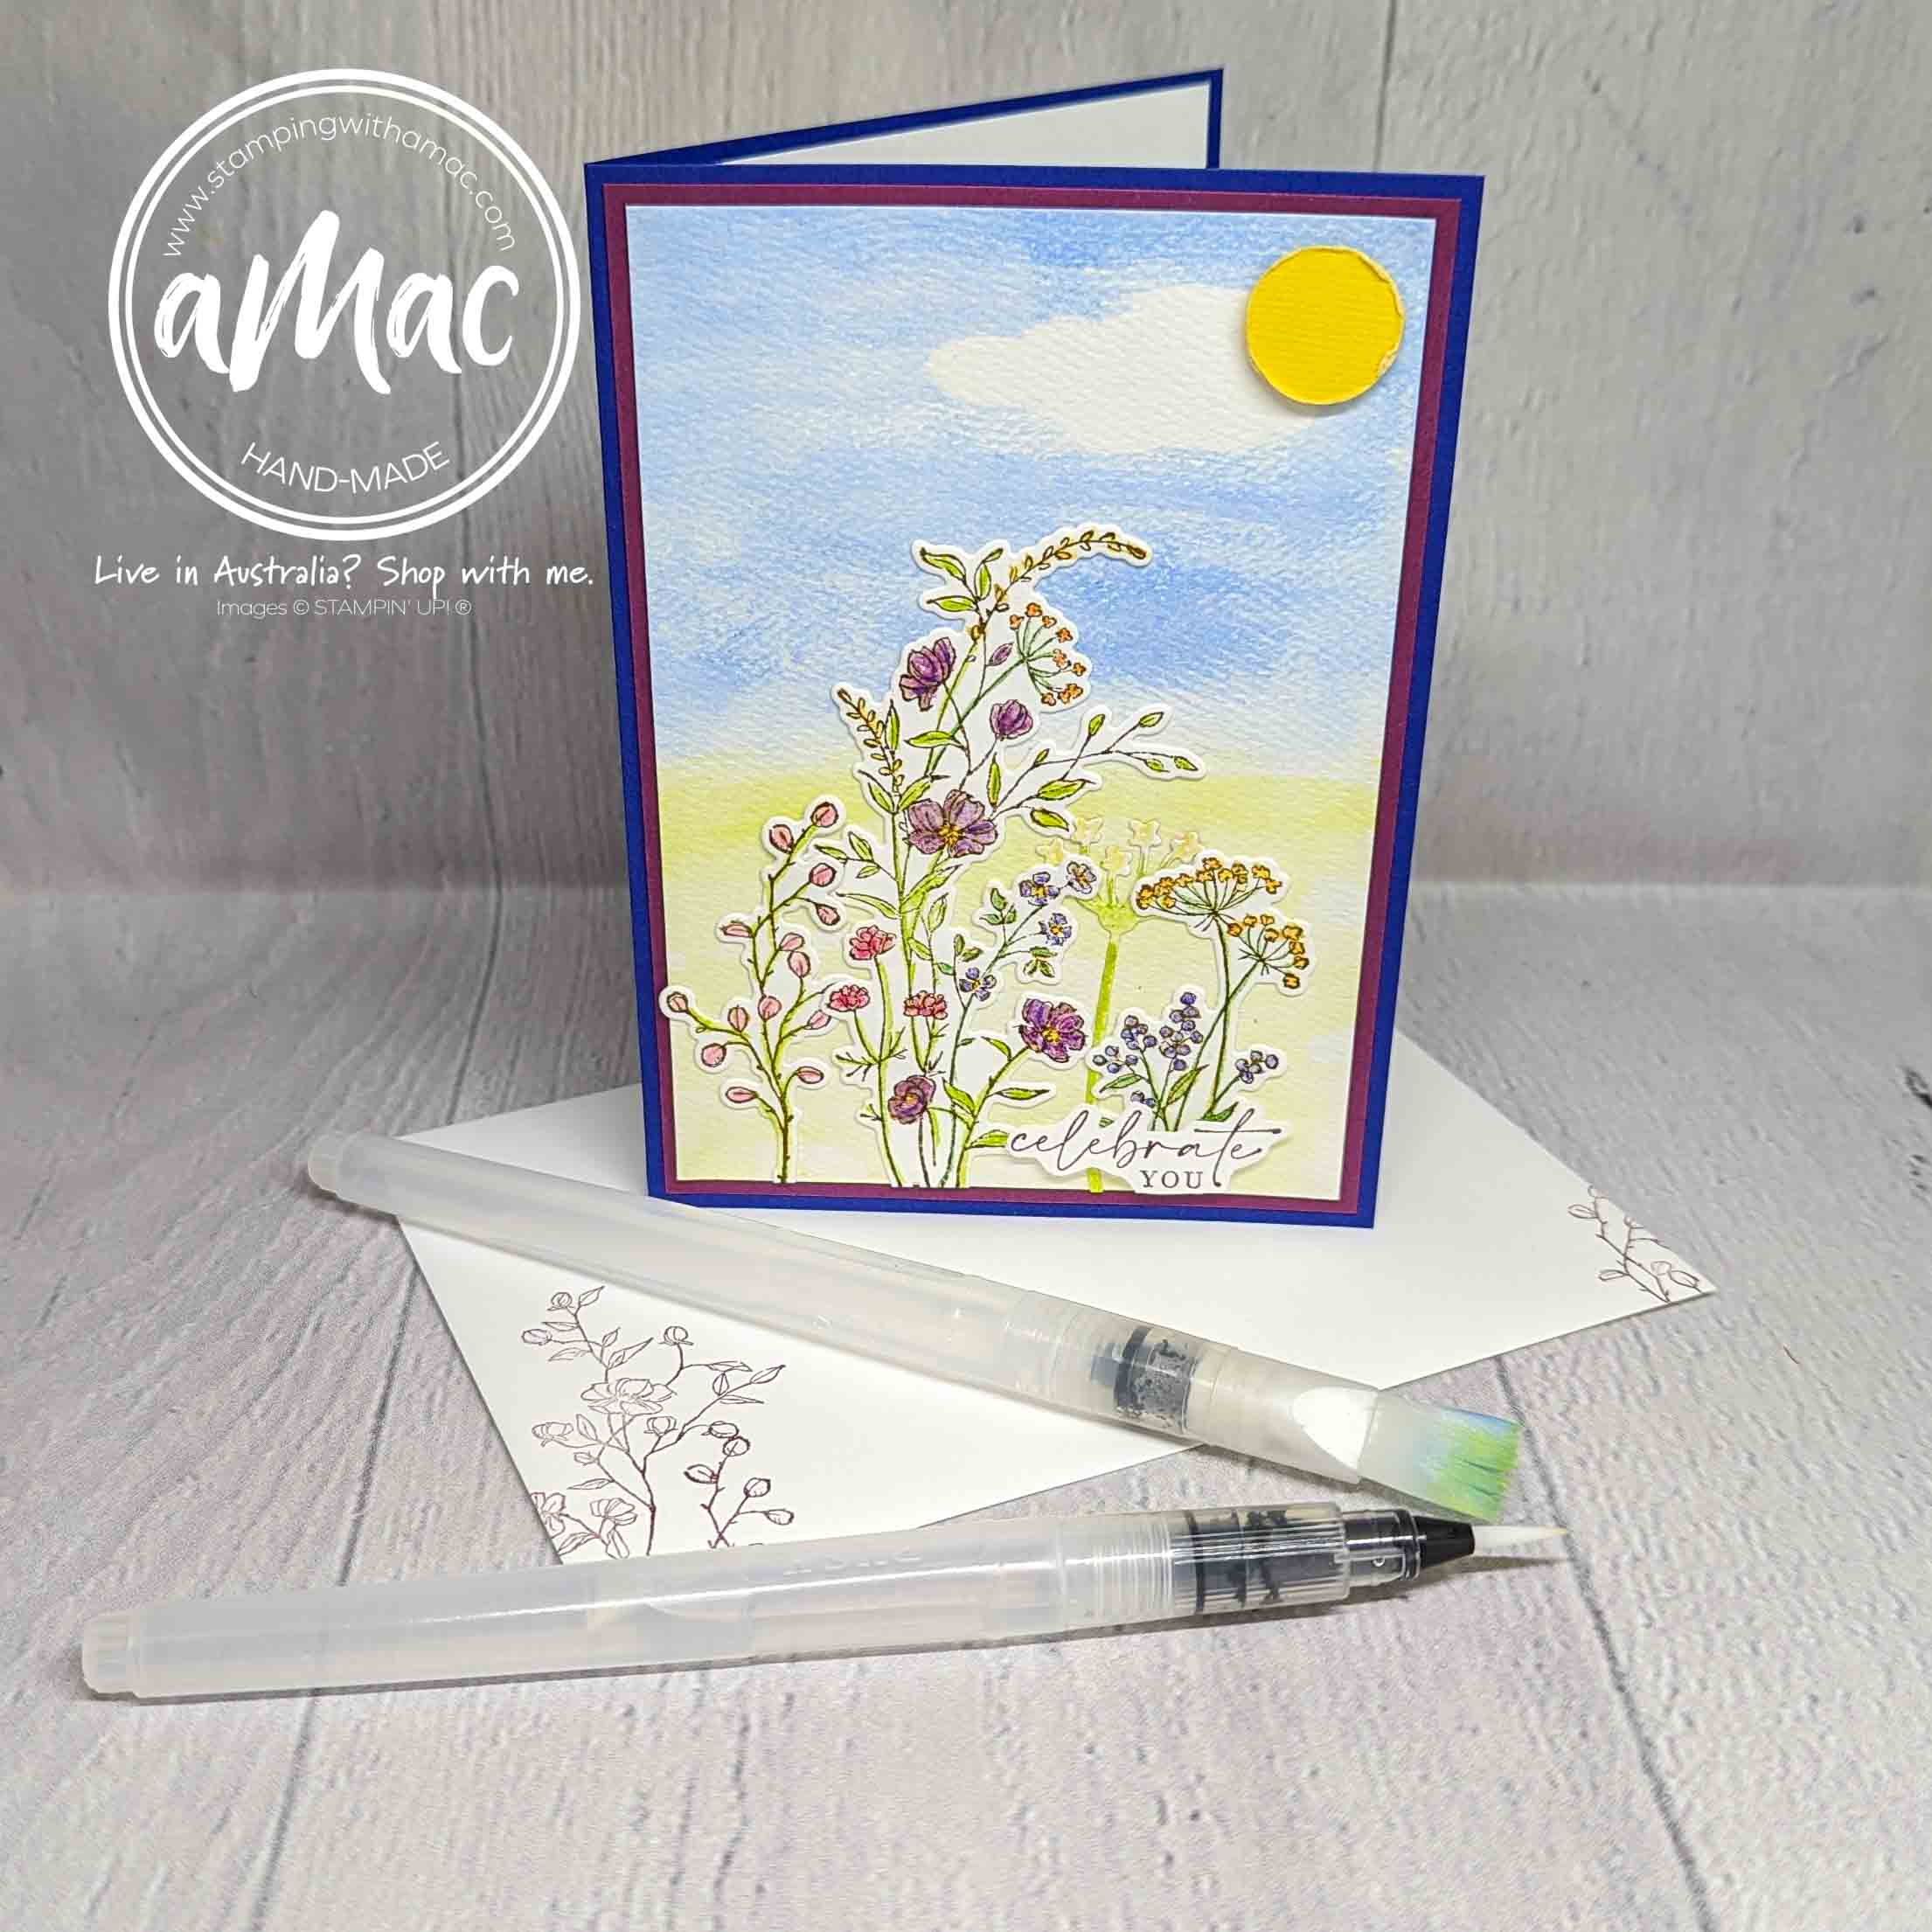
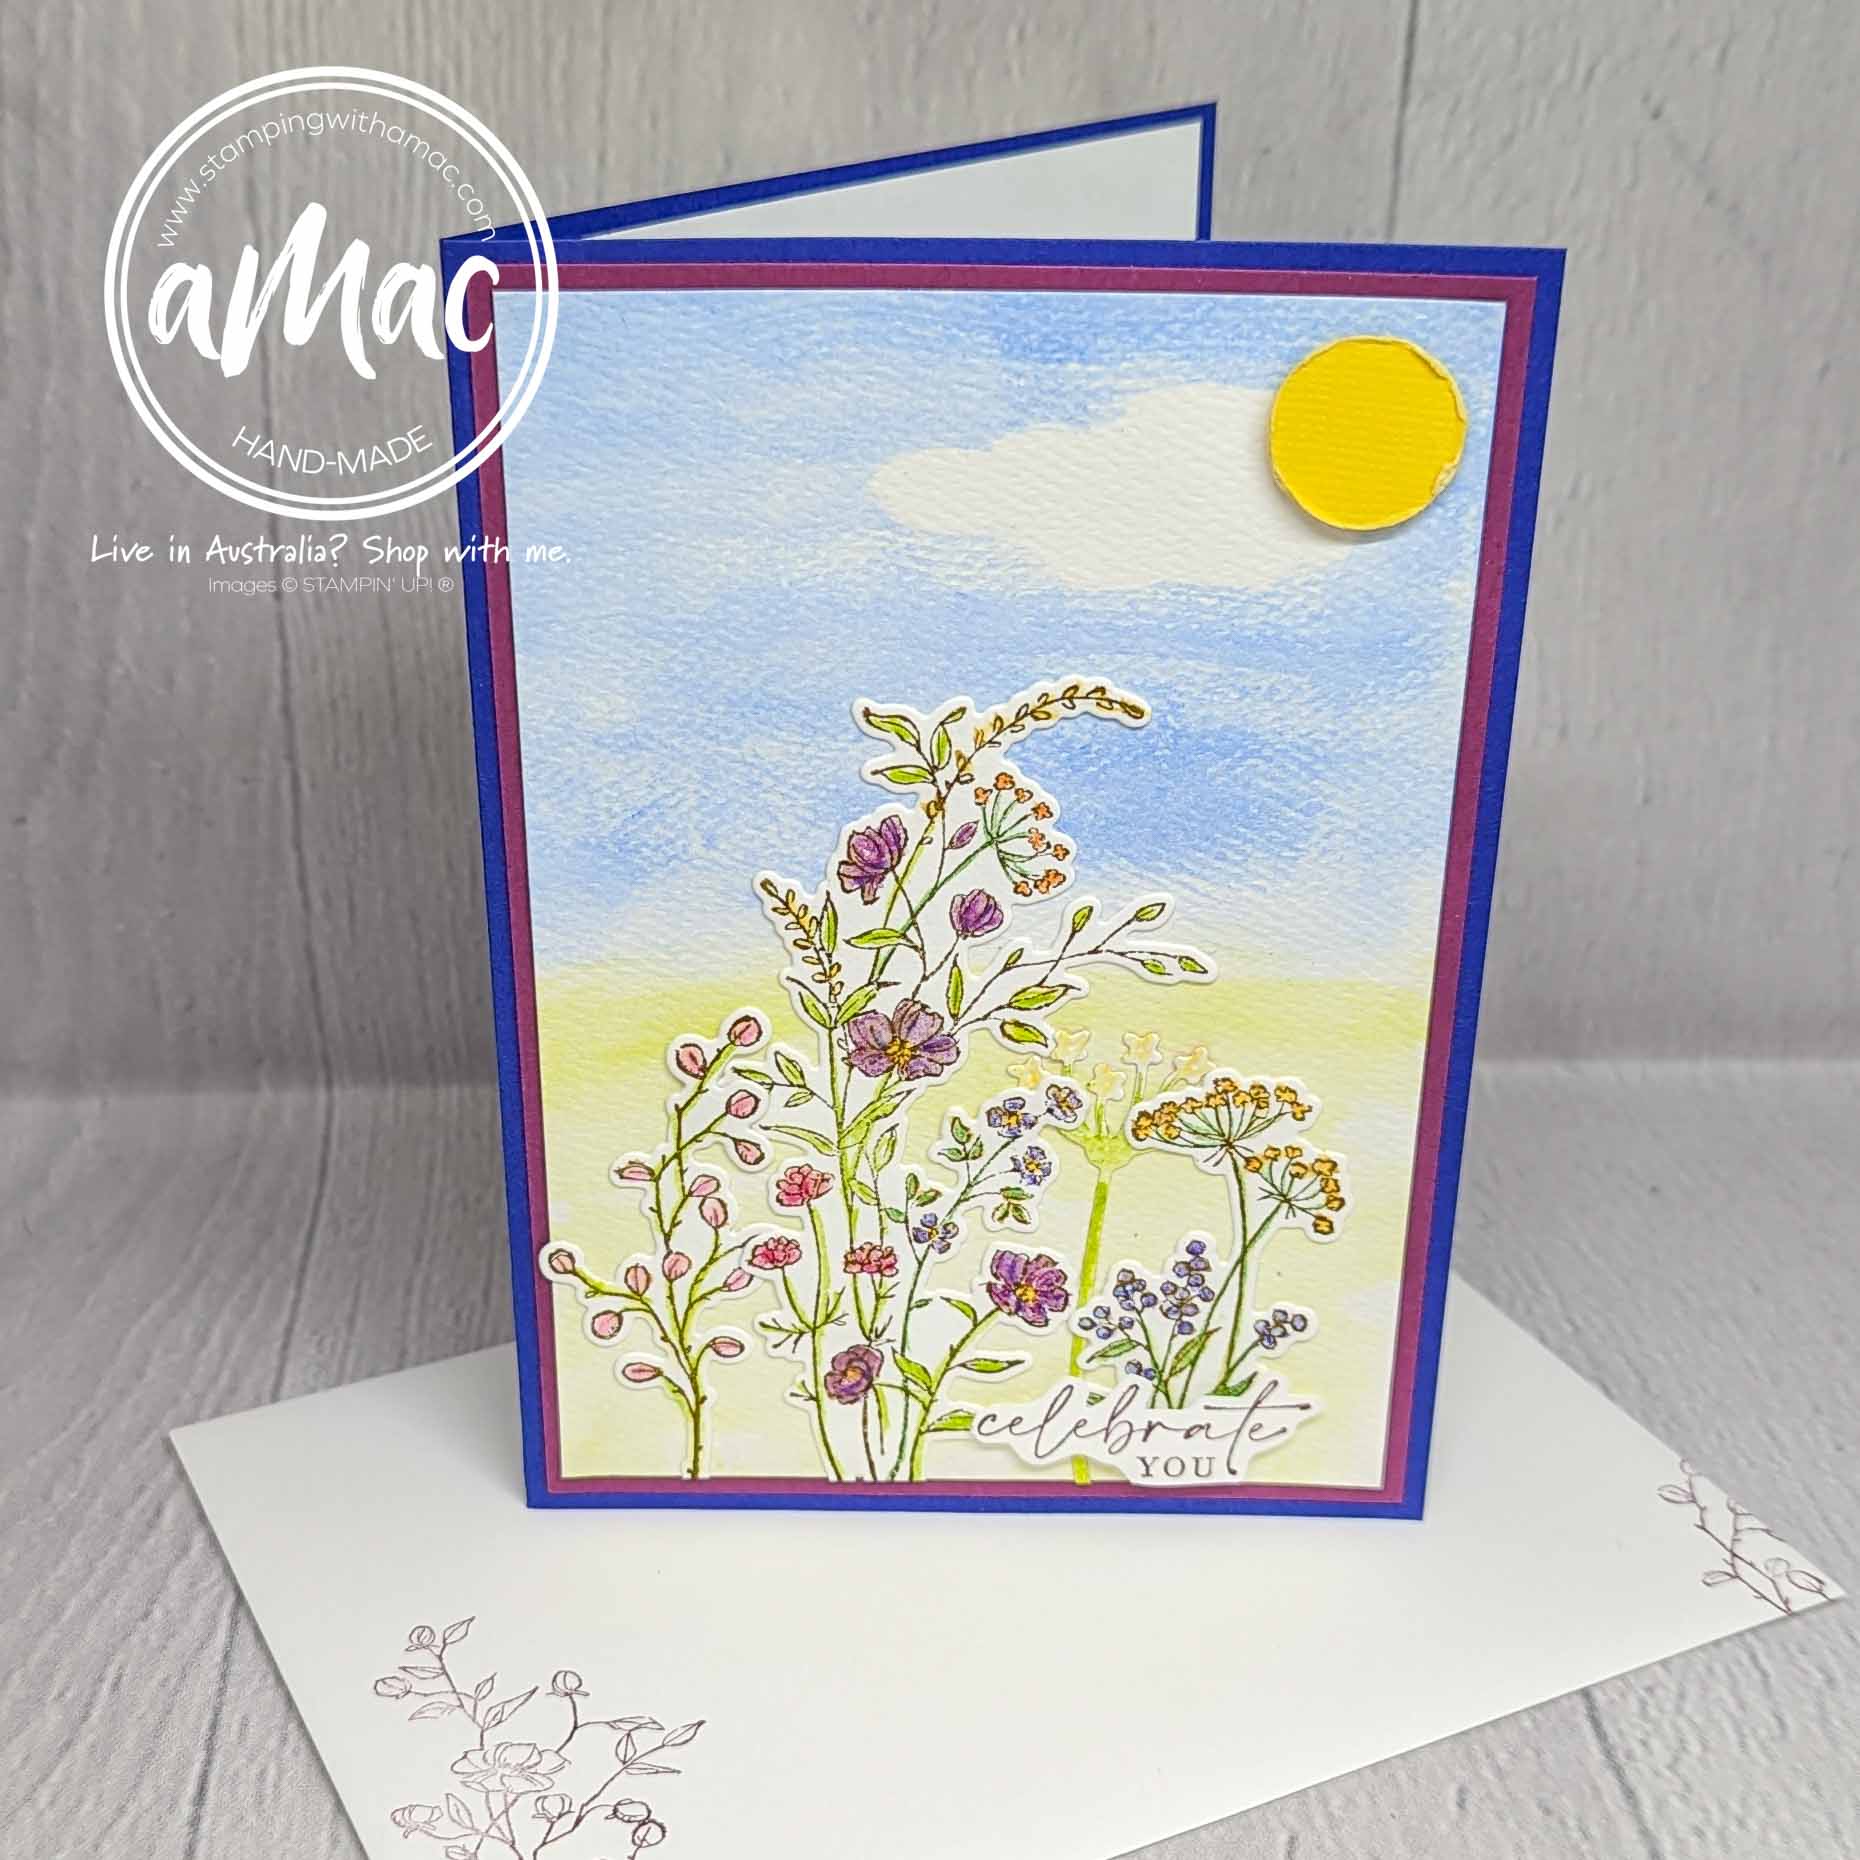
I used the brand new Dainty Delight Bundle for my card, this was available for pre-order as I was able to attend the Sydney Stampin’ Up! OnStage convention.
I used the finest of the water painters to start blending my colours together. You can control the flow by blotting the painter, I didn’t have it too wet.
Some areas such as the stems, I kept dry, no water added at all and others I went over very lightly to soften the look
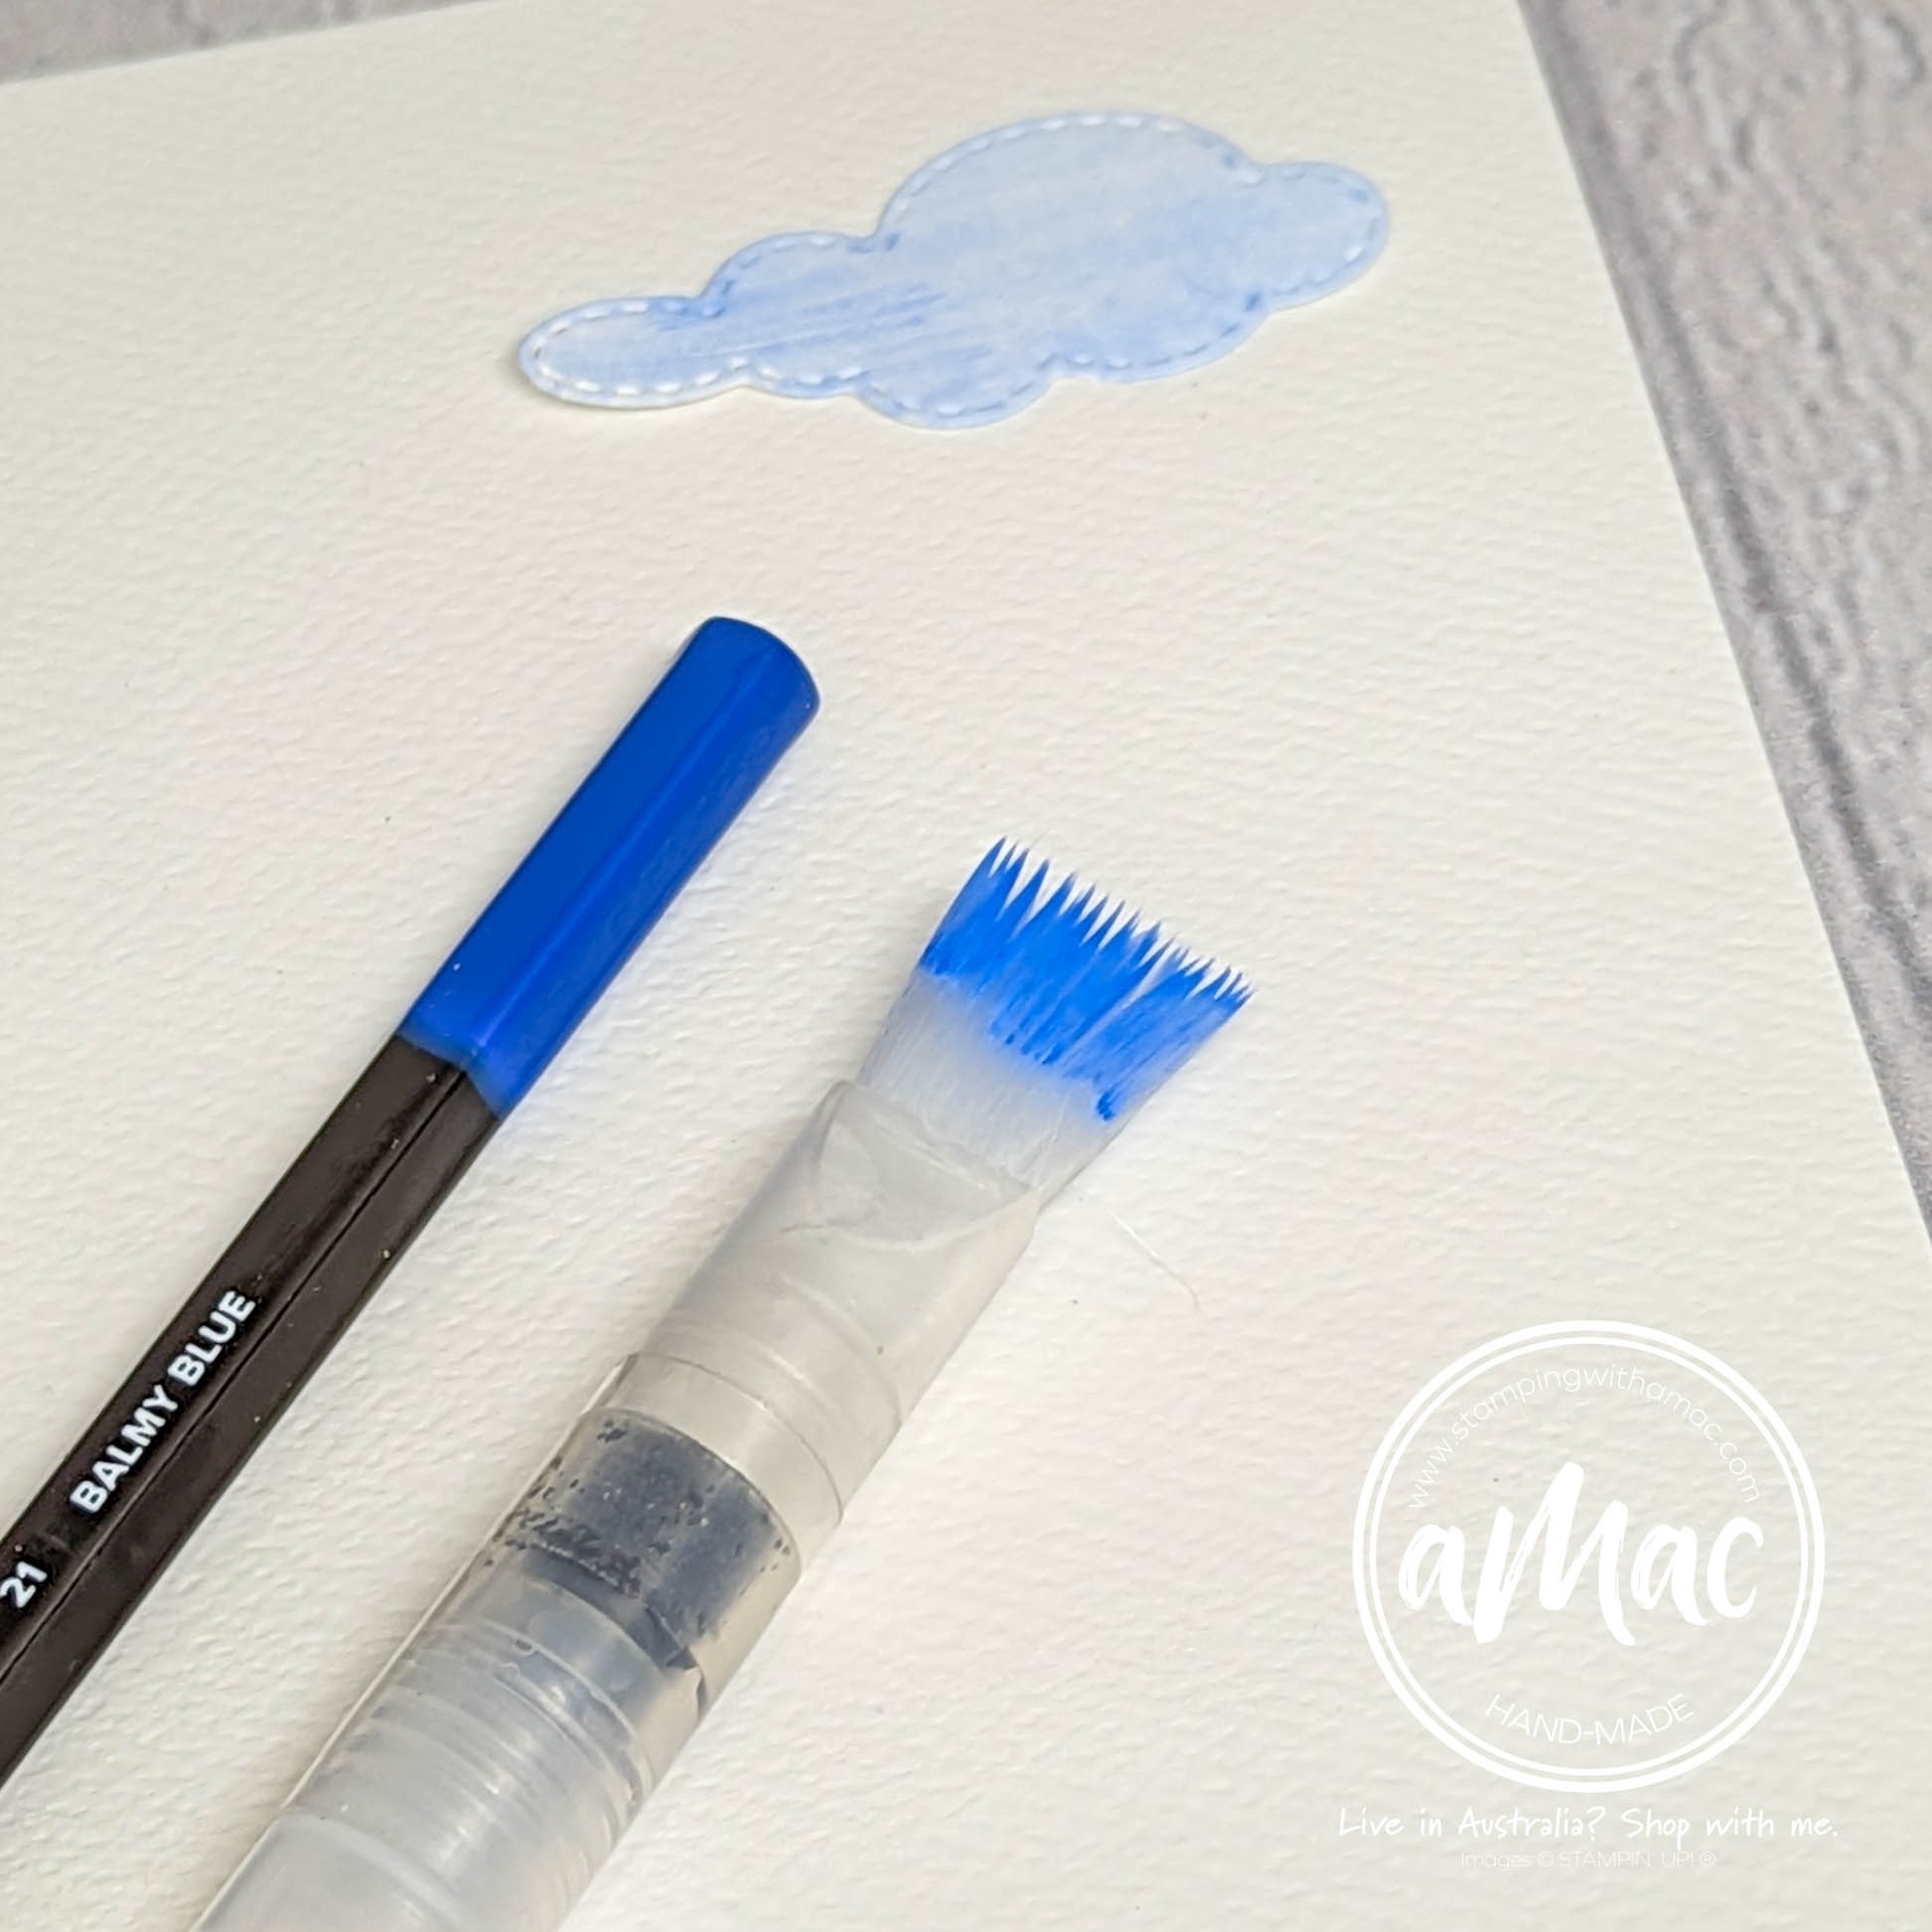
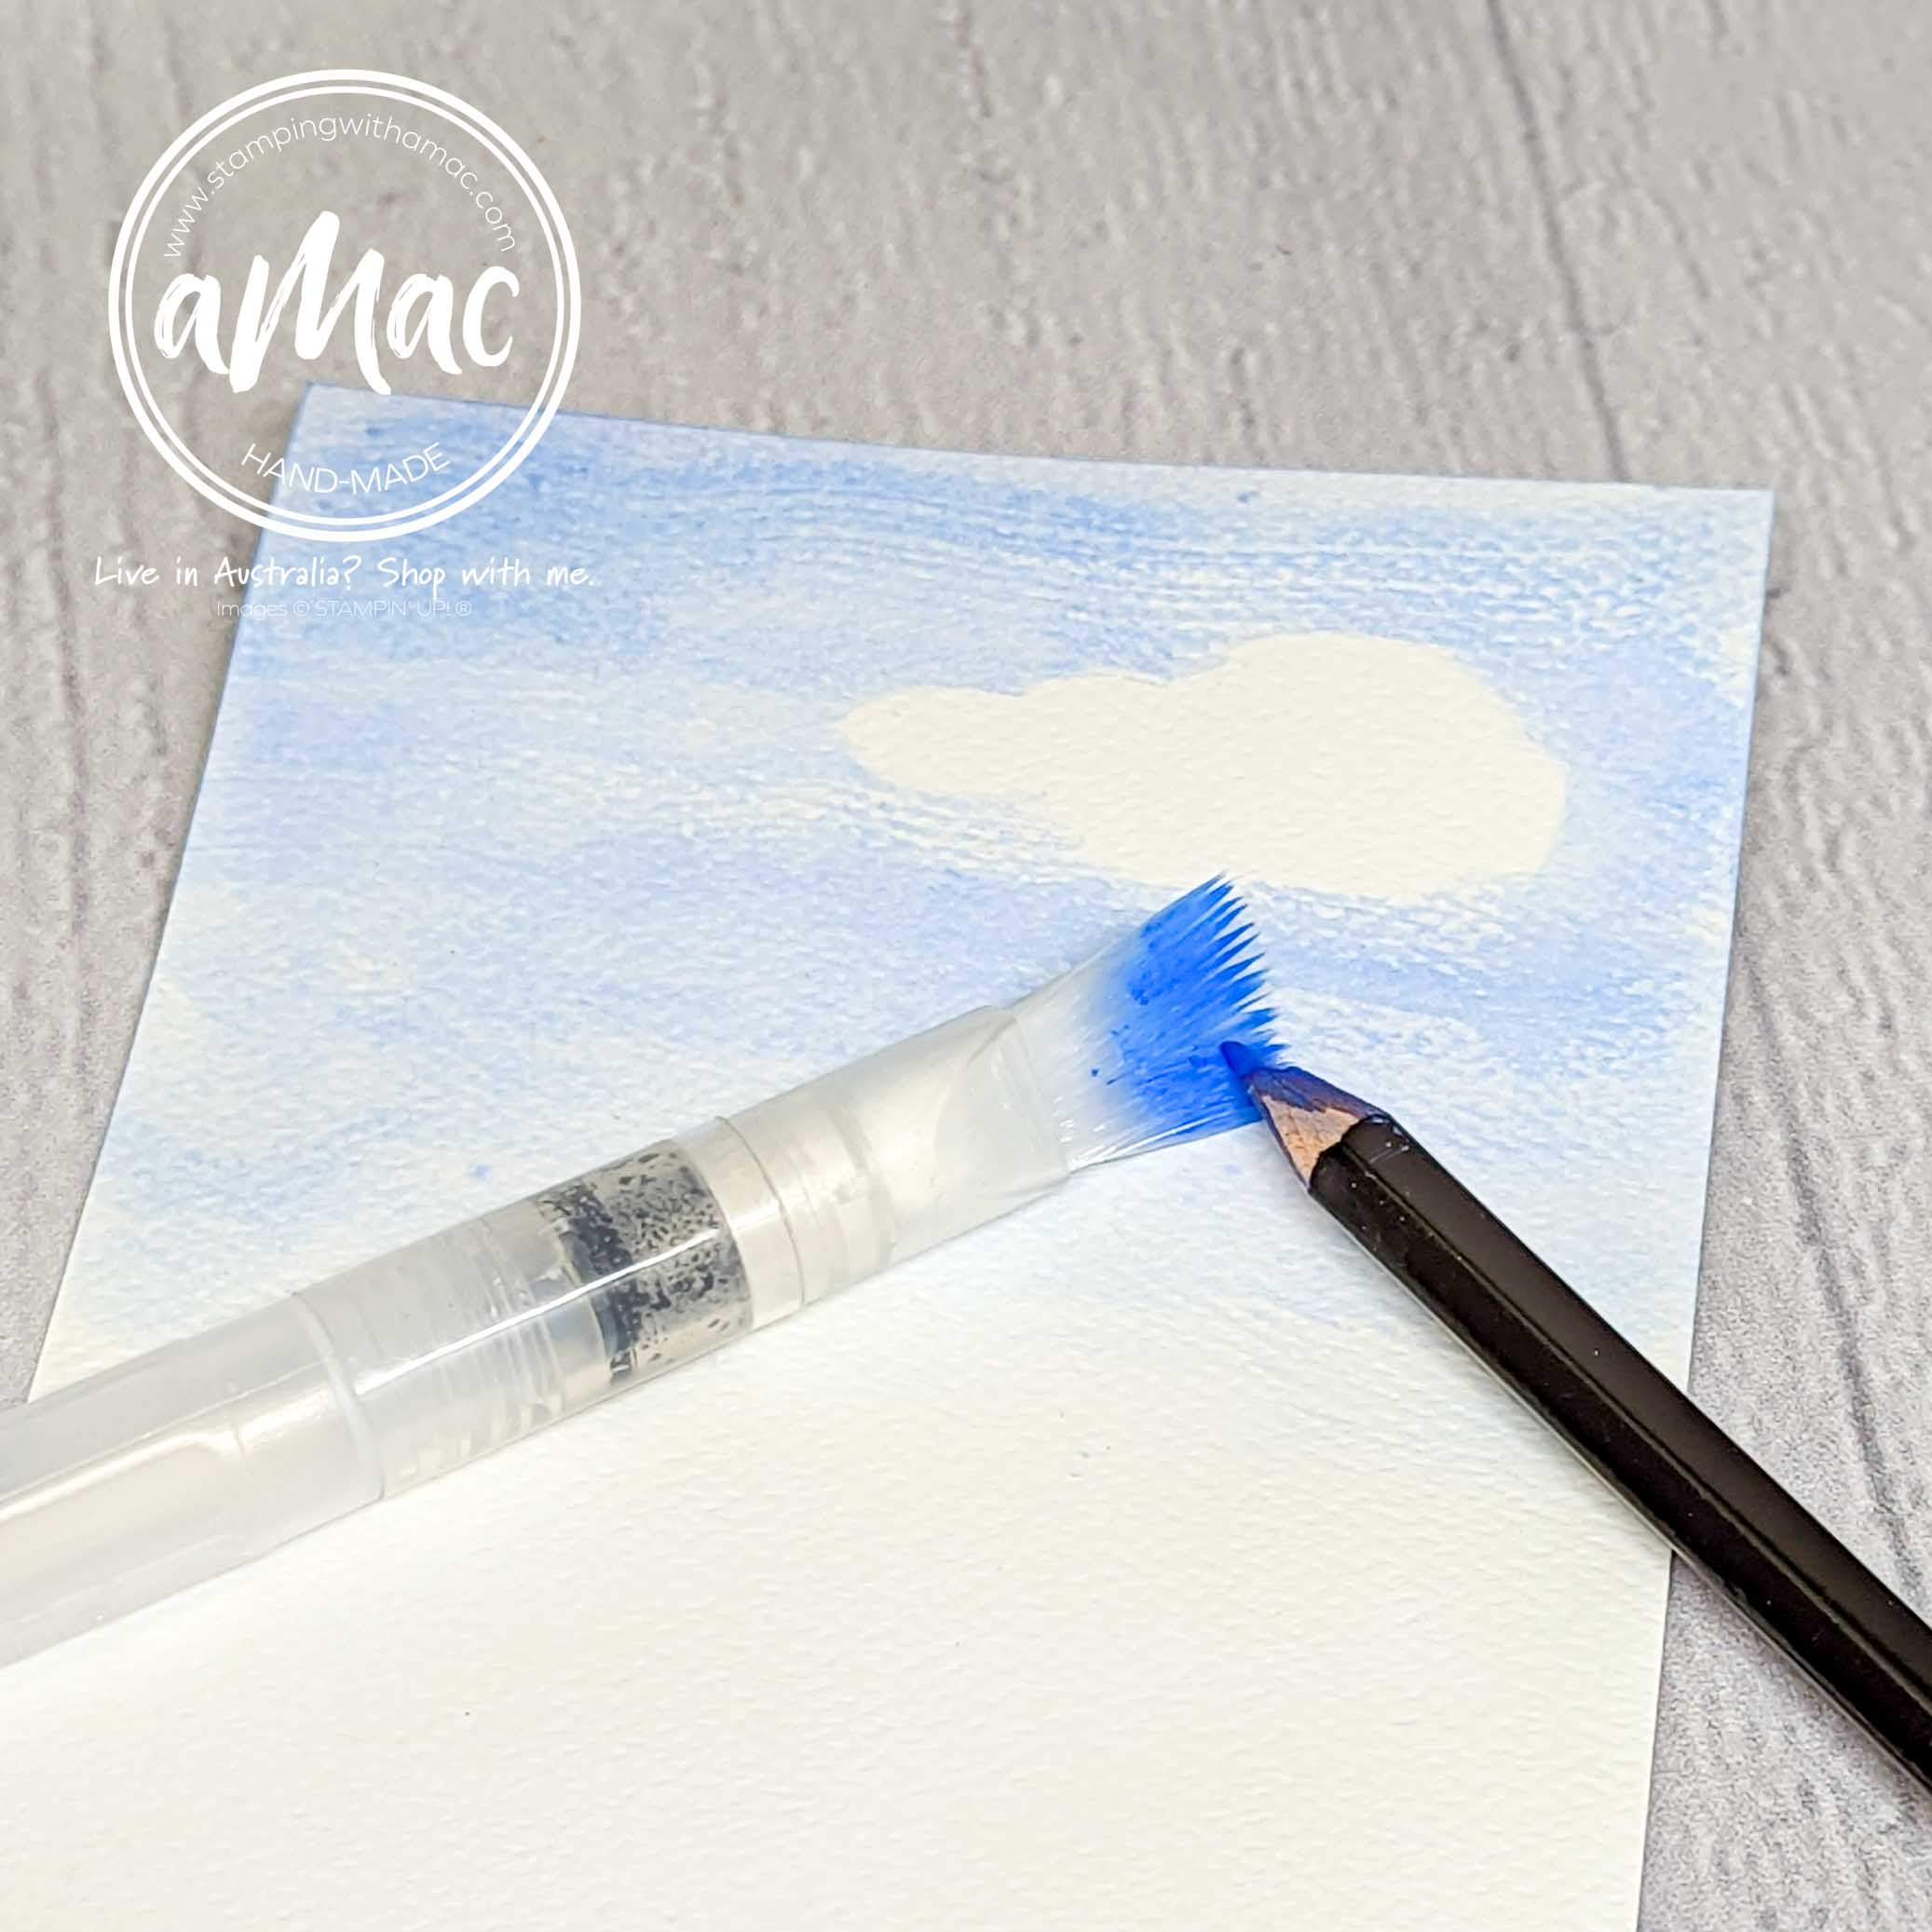
For the background, I used the Fluid 100 water colour paper. The cloud was die cut and just held in place as a mask.
I applied Balmy Blue colour pencil directly to the widest water painter then brushed this over the paper adding more colour to the brush as needed.
I found it stained the brush a little but that’s ok. I washed it out and then repeated the process with the Granny Apple Green pencil for the lower part of the card front. I just played until I was happy with the result.
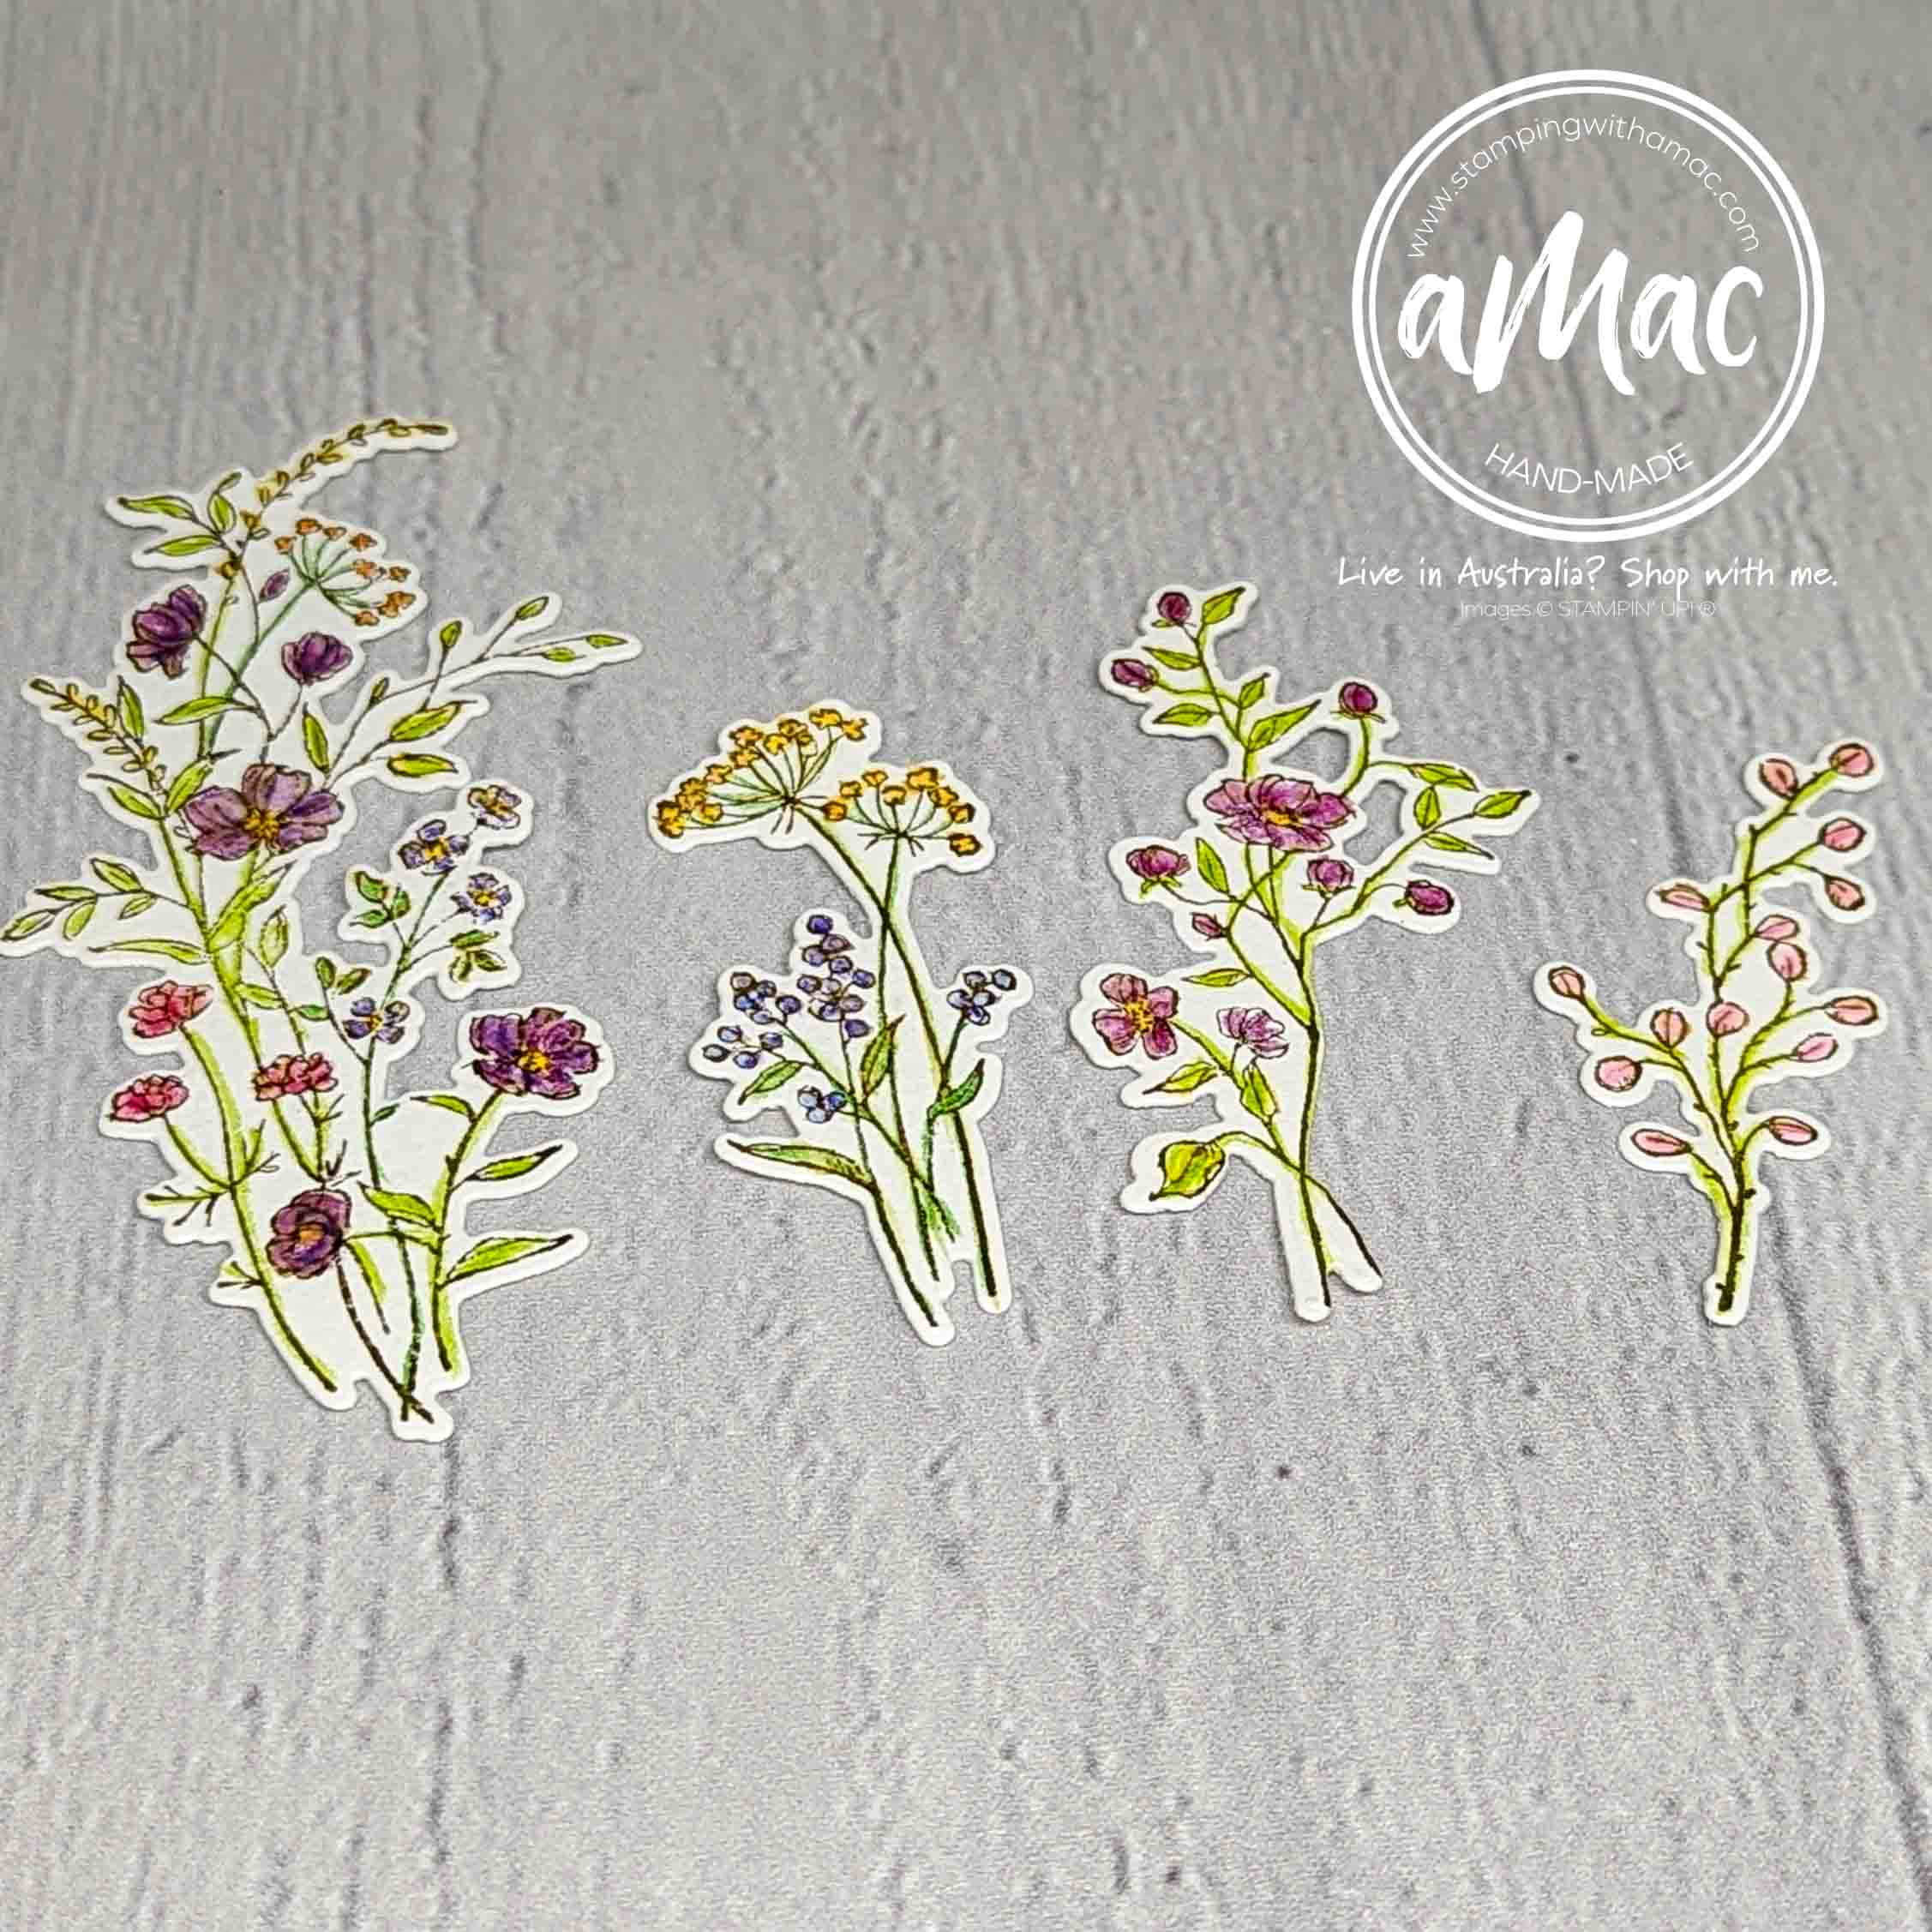
I die cut an image and added a splash of colour to it too, then arranged the rest of my die cuts on the card front.
The flowers were too pretty to cover up, so I didn’t overlap them much nor add ribbon or a large greeting.
The greeting is from the same stamp set and I hand cut it to show as much of the pretty flowers as possible. The greeting and sun are popped up on dimensionals.
This stamp set will be available on 5 January and will be $96.25 AUD for the bundle, this of course will earn you one Sale-A-Bration FREEBIE!!! Yippeee.
I hope you’ve enjoyed this technique and have a play using your water colour pencils in different ways.
Please click on the next link and have a look at what the rest of our talented team has created for this month’s hop and enjoy!


